Monday, September 19, 2011

AnPan Man

 Hey everyone. I just recently went to a Japanese Bakery for the first time, and, the breads were delicious! I never head about it until my friend mentioned it one day, and I knew I had to go out and try it. The first picture is of the AnPan Man from the bakery. They make the red bean kind and the chocolate kind. I decided to choose the chocolate kind (with chocolate cream too), because I like chocolate. It's pretty delicious and looks pretty cool. The next time I go, however, I'll try the actual red bean kind. So, I attempted to make the AnPan Man. I'm halfway successful. I realized that I didn't have anything to use to make the eyes and the mouth. I was able to make the cheeks and the nose, which I'm happy about. Maybe next time, I'll stick two chocolate chips for the eyes, or I can make icing and add food coloring. It's just an idea. Also at the bakery, they had Kobe Cream Delight, Double Chocolate Bread, Chocolate Hat, and the regular red bean buns. They also had Strawberry with Cream and blueberries and a lot of other things, but they cost a lot more. My favorites will have to be the AnPan Man, Double Chocolate and the Kobe Cream Delight. They are delicious. Anyways, the AnPan Man recipe. It's why I'm making this post. Well, here's the recipe. Enjoy. :)
What You need: 
  • The recipe for the bread dough
  • can of red beans
  • something you want to make the eyes and mouth (icing, beans, candy, chocolate chips, melted chocolate, etc.)
Dough (for those who are lazy):

  • 3 3/4 cup bread flour
  • 3/4  cup sugar
  • 1/2  cup warm milk
  • 1/2  cup warm water
  • 2 1/2 teaspoon active dry yeast
  • 1 egg, whisked
  • 1/4  cup oil

Directions: 
  1. In a bowl pour in the warm water and warm milk. Mix in the sugar. 
  2. Add in the active dry yeast and let it poof for about 10 minutes.
  3. Mix in the egg and oil. 
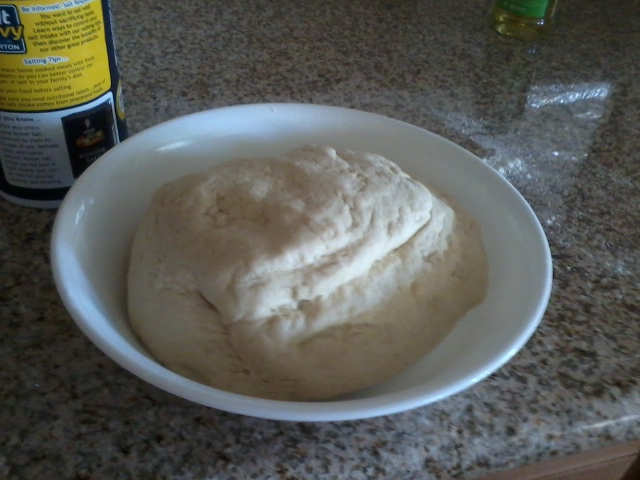
  4. Slowly add in the flour, cup by cup,  until a dough has formed. Knead the dough. It should be elastic, but it shouldn't stick to the bowl. 
  5. Cover it with plastic, and let it rise for about an hour in a warm place. 
  6. Push the dough down to let out the air.
  7. Divide the dough into 15 pieces, and let them rise for an hour.
  8.  Flatten the dough, add the red bean, and then enclose the red bean with the dough. Roll it into a ball.  Make sure you have extra dough. With the extra dough, you make 3 little circles for reach bun. 2 for the cheeks, one for the nose.
  9. Let it rise for another hour.
  10. Add in the eyes, if you are using chocolate chips or beans, or whatever you are using. If it's icing or melted chocolate, you add it after the bread is done baking. Brush the top with egg yolk if desired and bake for 13 to 15 minutes. Enjoy.


Monday, September 12, 2011

Mooncake 月饼

Hello Everyone! 中秋快乐! Today is the Chinese Mid Autumn Festival, or the Mooncake Festival, 中秋节. I've decided to post today, because of the special holiday. Every year for the Mid Autumn Festival, we all eat mooncake. It's a tradition. Mooncakes are delicious, but are a rare treat unless you make them yourselves. Chinese stores usually only sell them during the Mid Autumn Festival season, making them a rare treat. However, there are bakeries that probably sell them year round. There are so many different types of mooncakes, with different fillings, and different types of crust, including the regular baked crust or the snow skin mooncake. I personally like the regular baked crust better. I really like the lotus seed filling and red bean filling, without the yolk. Others like the yolk, but I don't. There are also other fillings like green tea, winter melon, and nuts, but I don't care for those. My favorites are lotus seed  (or white lotus seed) and red bean. So, here's a recipe for mooncakes. Enjoy. :) 


Ingredients: 

Dough: 

A
  • 4 1/2 cups flour
  • 1/2    cup powdered milk
  • 1/2    tablespoon baking powder   
B
  • 1 1/4 cup sugar
  • 4 eggs
  • 3/4  cup melted butter 
Filling
  • 4 cups Lotus Seed Paste or Red Bean Paste 
  • 20 salted egg yolks (optional, if you like egg yolks in mooncakes. I don't). 

Directions: 
  1. If you are using egg yolks, preheat the oven to 350 F and bake them for 10 minutes. Divide the red bean into 20 portions, and add 1 yolk to 1 portion of red bean. Roll it into a ball until the red bean covers the yolk. 
  2. In a bowl, sift together A. 
  3. In another bowl, mix together the B. Slowly add the A to the B and lightly mix. Divide the dough into 20 pieces. 
  4. Preheat the oven to 400 F. 
  5. Roll a piece of dough into a ball and flatten it to form a 4 in circle. Put one piece of the filling in the center and wrap the dough to enclose the filling. Pinch the edges to seal them and roll it into a ball. If you have a mooncake mold, place it in and then gently tap it out. If not, then, you can use a cookie cutter to make the mooncake into a circle or any shape. 
  6. Do this with the rest of the dough and filling, Then, if you want to, brush the top of the mooncakes with egg yolk. 
  7. Bake them for 30 minutes. 
  8. Take them out and enjoy.

Sunday, September 11, 2011

Crepes

Hello Everyone! How are you guys doing today? I'm doing fine, thank you very much. I'm already getting a lot of homework from school. That's what I get for taking 4 AP classes. Anyways, I decided to post a crepes recipe. I spent a lot of time trying to find a Japanese crepe recipe, but I failed at that, so I decided on making regular crepes. The recipes I founded for the Japanese crepes seemed very similar to the regular ones, so I decided just to make regular ones. They taste pretty good, and I love it with ice cream, bananas, and chocolate (nutella). You can add other things, if you want too. It's just my preference. I also like it with red bean ice cream. Red bean ice cream is awesome. Anyways, here's the recipe to the crepes. I hope you guys enjoy these.

Ingredients
  • 1 cup all purpose flour
  • 1 1/4 cup  milk
  • 1 egg
  • 2 tbsp sugar
  • 1/2 tsp vanilla extract
  • 1 tbsp corn oil
Directions 
1. In a bowl, mix together all the ingredients.
2. Heat up a non stick pan and butter it.
3. Take 1/4 cup of the mixture pour it on the pan and swirl it. Once it's nearly cooked on one side. flip it over and cook for another 20 to 30 seconds.
4. Take it off the pan, and let it cool, if you are using ice cream filling.
5. You can add any fillings you want now. After you add the fillings, you can wrap it any way you want.


Monday, September 5, 2011

Baked Pita Chips

Hello, everyone. Today is Labor Day. Happy Labor Day everyone. I hope everyone is enjoying their day. So, I said that I would post a recipe for pita chips. Well, here they are. This recipe is for baked pita chips, and it's really quite simple, really. It's much healthier than the packaged kinds, which usually have a lot of preservatives to keep them "fresh". In the picture, you can see that I ate these with hummus. Hummus is really yummy. My favorite is Athenos Roasted Garlic Hummus. There are other good flavors too, but I usually get this kind. Anyways, for the pita chips, you can buy pita bread from the store, or you can make pita bread with my recipe, here. It's really simple to make. You can also add other seasonings to make whatever kind of flavored pita chips you like. This is the kind I like. Enjoy. :)

Ingredients
  • pita bread
  • garlic salt (or regular salt)
  • cooking spray (olive oil or butter flavored)
Directions: 
  1. Preheat the oven (or toaster oven) to 400 F. 
  2. Lightly spray the pita bread with the cooking spray. 
  3. Sprinkle the salt on both sides of the bread. Cut into 8 triangles (or whatever shape chips you want).
  4. Bake for 6 to 12 minutes, depending on the size of the chips. 10 minutes should be sufficient. 
  5. Take out and enjoy. You can eat it plain, or with hummus. :) 

Saturday, September 3, 2011

Pita Bread

¡Hola! ¿Cómo están ustedes? Hoy, yo hice pan. Pita Bread. I wanted to make healthier bread to eat, since most store bought bread is quite unhealthy, and has a lot of preservatives. It was my first attempt making these, and I'm quite pleased with the results. I searched all online for a recipe, but, I ended up messing up the recipe and had to make up my own while actually making it. While adding flour to the dough, I miscounted at first, but then I realized my mistake. So, I had to fix it, and I remember the measurements to which I have fixed it. It still tasted quite good, and I was really surprised that a pocket actually formed with the bread, since some people have not had luck making the bread puff up like a balloon to make a pocket. Anyways, here's my recipe. Next time, I might try to make it healthier by using whole wheat flour, and using honey as a sweetener instead. It'd give it a nice flavor. Anyways, I like pita bread because you can use it for so many things. Pizza, chips, sandwiches, dip it in hummus. Hummus is yummy, especially with baked pita chips. Now that I think about it, baked pita chips will be my next post. Anyways, you need this pita bread recipe before baking pita chips. Enjoy.

Ingredients:
  • 3 1/2 to 4 1/2 cups bread flour
  • 1 tbsp sugar
  • 1 tsp salt
  • 1 tbsp olive oil
  • 1 3/4 cups plus 1 tablespoon warm water
  • 2 tsp active dry yeast
Directions: 
 
1. In a bowl, combine the water, sugar, and active dry yeast. Let it sit for 5 to 10 minutes.
2. Gradually add in the flour, 1 cup at a time. After adding in the first cup, mix in the salt and the oil.
3. Once all the flour has been incorporated, knead the dough until smooth and elastic.
4. Let the dough rise for 1 to 1 1/2 hours.
5. Divide the dough into about 10 to 15 balls, depending on how you want the size of the pita bread. I made mines smaller, making 22 pita breads.
6. Let it rest for 15 to 30 minutes.
7. Using a rolling pin, roll out the dough until about 1/4 inch thick. Cover the disks as you roll them
8 Preheat the oven to 500 F and bake them two at a time for 3 to 4 minutes, until the bread puffs up like a balloon and is pale golden.
9. Wrap them in a large kitchen towel to keep them soft.
10. Enjoy with some hummus or make a sandwich with it. You can also make pita chips or a pita pizza. It's your choice. Enjoy.


Enjoy your pita bread! My next post will be pita chips.

Friday, September 2, 2011

Gluten Free Pancakes (Rice Flour Pancakes)

Hey everyone. What's up? Well, today, seems to be an off day for me. I've had a weird day. I have no clue why it feels that way. I hate feeling like this. Anyways, I made pancakes today, because my brother loves pancakes, and he wanted some. The only thing is that, we ran out of regular all purpose flour to make these pancakes. So, I looked online and searched for a gluten free pancake recipe, the one that doesn't use flour. Well, the one I found uses rice flour. I edited it a little bit. However, these pancakes taste yummy. I was quite surprised. However, this pancake doesn't look good, huh? Well, it's because I found out that the batter is really funny. I was unable to make perfect circles with it like I do with my regular pancake recipe, which is here. At least they taste good. Well, here's the recipe. Enjoy. 

Ingredients
  • 1 cup rice flour
  • 3 tablespoon sugar
  • 2 teaspoon baking powder
  • 1 cup  milk ( I would reduce it, since it was really runny with the full amount)
  • 1 egg
  • 2 tsp oil
  • 1 tsp vanilla extract
Directions: 
  1. Mix together the flour, sugar, and baking powder. 
  2. Gradually pour in the milk, while mixing. 
  3. Mix in the egg, oil and vanilla extract.
  4. Let it sit for 20 minutes and then cook both sides until golden. 
  5. Enjoy. You can add chocolate chips, syrup, fruit, powdered sugar, or whatever toppings you guys like. 


I'll be making pita bread the next post. Keep updated. :) Pita bread is yummy. Especially with hummus.

Related Posts Plugin for WordPress, Blogger...