Showing posts with label asian dessert. Show all posts

Sunday, February 3, 2013

Chinese New Year Recipes

大家好!

As you know, Chinese New Year (CNY) is coming up. It's on February 10th. 新年快乐!By the way, today is also my blog's birthday! Anyway...

Since the New Year is coming up soon, I thought I'd link up some of my recipes here so that you guys can make things for the CNY. It's also known as the Lunar New Year.

So, for the sweets, here are the recipes:

Traditional Fa Gao 发糕 Chinese Prosperity Cupcakes
发糕 Recipe
年糕 Steamed Chinese New Year Cake
Red Bean Mochi 糯米糍
煎堆 Red Bean Sesame Balls
烤年糕 Baked Nian Gao
Steamed Sweet Glutinous Rice Balls

There are also other things like peanut cookies, almond cookies, and some pastry cakes but what I have are the basics.

Here's some savory ones:

饺子 Potsticker/Dumpling Recipe

This recipe is from another website but it's a Chinese recipe. On Chinese New Year, the first meal eaten should be vegetarian. It's called Buddha's Delight, or Jai. Here's a link to a recipe. 

I hope you guys enjoy these recipes!

Do you celebrate the lunar New Year or CNY?
What's your favorite CNY treat?

Monday, January 21, 2013

蕃薯糖水 Chinese Sweet Potato and Ginger Soup

Hey hey everyone! How are you guys doing today? As you know, I just finished my health challenge and I have to say, I learned something from it. I mean, I already knew it but it was reinforced after completing the challenge. What I learned is that you should eat things in moderation. If you have a chocolate craving, have a little chocolate. Just don't go overboard. What I also learned is that you don't have to eat super clean to be healthy. Sometimes, it's just not possible to eat 100% clean, due to the environment you live in such as money and the people you live with. It's just better to make healthiest choice possible depending on the situation. Also, my weight pretty much stayed the same (I lost about 2 lbs).
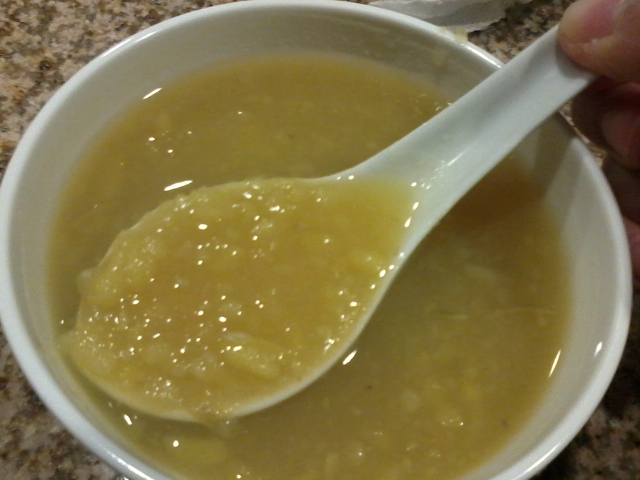
With that being said, here's the recipe for the sweet potato soup I've been talking about lately. It's mainly healthy and nutritious (except for the added sugar). I love this sweet potato soup. Well, actually, when I was little, I loved it. Then, as I was in my elementary school and middle school years, I didn't want to touch it. Now, I love eating it again. It's weird how our taste bud changes, huh? Anyway, here's the recipe. I'm sorry that there's no exact measurement but that's how my parents make things. They eyeball the amounts.

Ingredients:

  • 3-4 medium to large sweet potatoes
  • about 8 cups water
  • 5 -6 sticks Brown Sugar Pieces , depending how sweet you like it
  • ginger (optional)
Directions:
  1. Peel the skin off the sweet potatoes. Then, cut them into small chunks. 
  2. Pour the water into a pot and place the sweet potatoes in. Boil and cook the sweet potatoes until it's soft. 
  3. Then, take it off the heat.  Pour some water out of the pot into a huge bowl. Using a huge spoon, mash the sweet potatoes. Then, pour the water back in. 
  4. Add in the brown sugar pieces. Cover and heat it until it boils. Then, add in the ginger. Let it sit for a few minutes. 
  5. Serve and enjoy.
It's great to serve on a nice cold day. I absolutely love it. Also, if you do not have the brown sugar pieces, you can use brown sugar. You will need about 1/2 cup to 3/4 cup, depending how sweet you like it. Adjust it to your taste buds! 

Now, I just ate my new Alpine Valley Multi Grain with Omega-3 Bread. I tried one slice with the PB& CO Dark Chocolate Dreams and another slice with Crunch Time. 


Doesn't it look delicious? I love how the Dark Chocolate Dreams was nice, smooth and creamy. It had more of a peanut butter taste to it but it was still good. You definitely could taste the chocolate too. I love the combination of peanuts and chocolate. 

As for the Crunch Time, I was pleasantly surprised with how much peanut pieces were in the peanut butter. I loved how it gave it a crunch in contrast to the peanut butter. It was sweet but not too sweet. 

As for the bread, I have to say that I'm surprised on how generous they were with the seeds and everything they put in it. The bread had seeds within it too. The bread was chewy on the outside, nice and fluffy in the inside. I enjoyed it. It had a natural sweet, whole grain taste to it. 

What I'm not so happy about are the ingredients. Yes, the first ingredient is Organic Whole Grain Wheat Flour but then the next ingredient is Organic Wheat Flour. Do you notice the word "whole" is not there with the wheat? I'm disappointed that it all the flours they have isn't 100% whole. At least the Organic Whole Grain Wheat Flour was the first on the list, making it the predominant ingredient. It's also good that it's organic. Each slice has 3 grams of protein and 65 calories. Not bad. 

Anyway, reading labels is important. 

What type of bread do you guys like? 
Do you like sweet soups?

Sunday, February 12, 2012

紅豆沙 Red Bean Soup

 I love eating anything red bean. I think I've said that before. So, I was so happy when my mom decided to make 紅豆沙, red bean soup, today. It's been a long time since I have eaten it. It's delicious.
I remember when I was younger, I used to not care for this dessert. I don't know what I was thinking. My mom would try to get me to eat it, but I refused. Now, it's my favorite. Red bean is awesome.
The restaurants make it a bit differently then my mom does, in that they don't add many nuts and beans and that stuff. Usually, restaurants just have the soup, red beans, rice and occasionally some weird pearl stuff. Theirs is also sweeter. I like mines sweet but not to sweet. Also, when my aunts make 紅豆沙, theirs is twice as sweet. Literally, since they add twice as much brown sugar pieces than my mom does. Me and my mom don't like it too sweet and it's also a bit unhealthy adding all of that sugar. So, if you guys like things sweet, you can add more sugar than stated in the recipe. Also, there are no exact measurements for this recipe. Enjoy.


Ingredients:

  • half a bag of red beans
  • 1/4 bag of mixed beans
  • 1/4 cup lotus seed
  • peanuts 
  • 1 cup rice (my mom uses Jasmine White Rice)
  • 1 bag Brown Sugar Pieces (Rock Sugar)
  • water


Directions: 
  1. In a large saucepot, combine all the ingredients EXCEPT for the brown sugar pieces. Rinse and rain them a few times. Then, let it sit in the water for half an hour to an hour. 
  2. Add water until the pot is almost full. Then, bring it to a boil. 
  3. Reduce the heat to a simmer, and let it cooked uncovered for 1 1/2 hrs to 2 hrs. 
  4. Then, add in the brown sugar pieces. Stir until it melts. Taste the soup. If you like it sweeter, add another bag. 
  5. Enjoy. 


Friday, December 30, 2011

Red Bean Paste 红豆沙

Hey everyone!大家好! The New Year (新年) is coming up, so I decided to make red bean paste, 红豆沙. I used it to make Chinese steamed buns and red bean mochi. Anyways, this red bean paste is delicious. My family loves it. I personally like the chunky texture of red bean paste. I like it smooth too, but it depends on what you want to use it for. The chunky version is thicker, so it's easier to use as a filling for something, like mochi and buns. I love eating it just by itself too. The canned ones don't taste as good, but if you like smooth 红豆沙, you might as well buy it, unless you want to do some extra straining to make it smooth.
This took a total of 26 hours to make. It's because you have to soak the beans for 24 hours. You can soak it for just a few hours, but the cooking time will be longer. Anyways, it's well worth the effort. I hope you guys enjoy this red bean paste.

Ingredients: 
  • 14 oz bag of dried red beans
  • 1 3/4 cup sugar
  • a pinch of salt 
  • water (to boil the beans)

Directions: 
  1. Soak the beans in water for 24 hours. The beans will grow larger in size. You may need to add more water as time goes on. 
  2. Rinse the beans and put them in a pot. Add water to cover the beans. Bring it to a boil and boil for 1 minute. Remove from heat, drain the beans and put them back in the pot. 
  3. Add water so that the water is 1/2 in above the beans. Bring it to a boil. Then reduce the heat and let it simmer, covered, for about one hour to 1  1/2 hours. The beans should be soft and easy to smush.
  4. Drain the beans  and rinse the pot. Put the beans back into the pot and put it over medium low heat. Mix  in the sugar 1/4 cup at a time.Then, mix in the salt.
  5. Once the red bean has become thick in texture (it may take 10 to 30 minutes), turn off the heat. Smush the beans with a potato smasher or a spatula. If you like a smoother texture, you can put it in a blender or put it through a cloth strainer. This would take a long time though. 
  6. The red beans are ready.


 I hope you guys enjoy. :)

Sunday, November 13, 2011

Steamed Sweet Glutinous Rice Balls


These are the ones my aunt made. I helped her.
I've had a craving for the steamed glutinous rice balls since my aunt made them a week ago. The only time I ever eat them is when my aunts make them to bring to the huge family gatherings. So, I finally decided to ask them how to make these Steamed Sweet glutinous rice balls. It's the not actual translation, but it's what I'm calling it. In Taishanese, it's called yuan tei. The ones I made look ugly, while the ones my aunt's made look nice. I added too much water, which gave it that look. My aunt never told me the liquid measurements for the recipe, so I guestimated. I did measure the liquid though, so, I can say to not go over 5 cups of water.
Mines didn't turn out so pretty, but they were delicious.
 However, they taste just the same. Maybe another problem is that I halved the recipe to make this, but, it's okay. I'm sure your guy's attempt will be better. I'll remember to use less water next time. It'll make it look better too. I will replace the picture once I made it again. They taste pretty good though. As long as something tastes delicious, the looks of it shouldn't matter. Here's the recipe.

Ingredients:

  • 1 bag glutinous rice flour
  • 1 bag wheat starch
  • 1 bag of brown  candy sugar
  • 1 1/2 cups water
  • 3 cups water
Directions:
  1. In a pot, boil the water and add all the sugar until it all melts and dissolves. Then, mix in half the bag of wheat starch. Keep mixing and stirring until it gets a bit thick. Remove from heat. 
  2. In a bowl, mix together the rest of the dry ingredients and form a volcano. In the center of the volcano, add in the sugar mixture. 
  3. Mix the mixture together until it forms a dough. You may need to mix and knead it a few times. Be careful, since the mixture is hot. 
  4. Once the dough has formed, you take small bits of dough and roll them into palls. Place them on a pan. Put them all together on the pan. Once you have used up all the dough to make the small balls, steam them for 30 minutes. You may need more than 1 pan.
  5. Take out and enjoy. You might want to let them cool a bit first. Remember to cover these soon, for these tend to dry out a bit easier due to the lack of lipids. 


As you see, mines didn't turn out so pretty, but the ones I helped my aunt make did. At least mines tasted the same. It just looks different.


Friday, October 7, 2011

Dorayaki どら焼き

Hey everyone. How are you guys doing? Well, I've been busy with school and it's been crazy. Everyone knows how school is. So, anyway, I've been posting a lot of Japanese recipes lately. It's kind of strange, but still, it's Asian. Anyways, I decided to make dorayaki, because I love red bean paste and cake. It's my absolute bean paste ever. I do like lotus seed paste the best, but it isn't a bean paste. Anyways, red beans are awesome. So, compared to the store bought ones, mines taste a bit different and the texture is different. They're both still quite delicious. Here's a recipe to the dorayaki I made. You can adjust it to suit your tastes. Some of you guys might say it's a bit too sweet, but I like things really sweet. So, here's the recipe. Enjoy.

Ingredients

  • 1 cup flour
  • 2/3 cup sugar
  • 1 tablespoon honey
  • 2 eggs
  • 1/4 cup water 
  • 1/2  tsp baking powder
  • red bean paste
Directions:
  1. In a bowl, mix the eggs and the sugar together. 
  2. Mix in the honey. 
  3. Then, add the flour and baking powder and mix. Then, slowly add in the water. The batter might be a little thick. You can add a little bit more water if you need to.
  4. In a non stick pan/skillet, pour about 1/4 cup of the mixture (or a little less) onto the pan over medium heat, and let it cook until it starts to bubble. Then, flip the cake until it's cooked. Take it off the pan, and cook the rest of the batter this way. 
  5. To make the dorayaki, you will need two cakes to make one dorayaki. Take one cake, spread red bean paste over it, and then cover it with another piece of cake. There you go. Enjoy. :) 


Related Posts Plugin for WordPress, Blogger...